When we first moved into our home, we were welcomed with a surprise. I won’t get into too many details, except there was a lack of cupboards that were once there. Both my Husband and I knew right away that the mudroom would need to be refinished right away.
This got me really excited because I love redecorating and DIY projects. We planned a full gut! Our house is a 150 years old, and we didn’t want to add to whatever was already there, like a sixth layer of flooring.
During our planning we realized the powder room definitely needed some sprucing! And the floor around the toilet was soft and bouncy to the step, making us concerned that the toilet was leaking under the floor. Which we were right!
So we ripped it all out! It was such an up and down day. I was so happy that we were doing it, but anxious because of all the work ahead. And we were already finding a few surprises.

I would like to give a huge shoutout to my amazing Husband for taking on such a big project and for doing sixty percent of the work, which that portion was probably the hardest stuff to do! But we did do it mainly as a team, and it makes me feel proud that we can work together. And relieved that a huge Reno won’t kill our relationship.
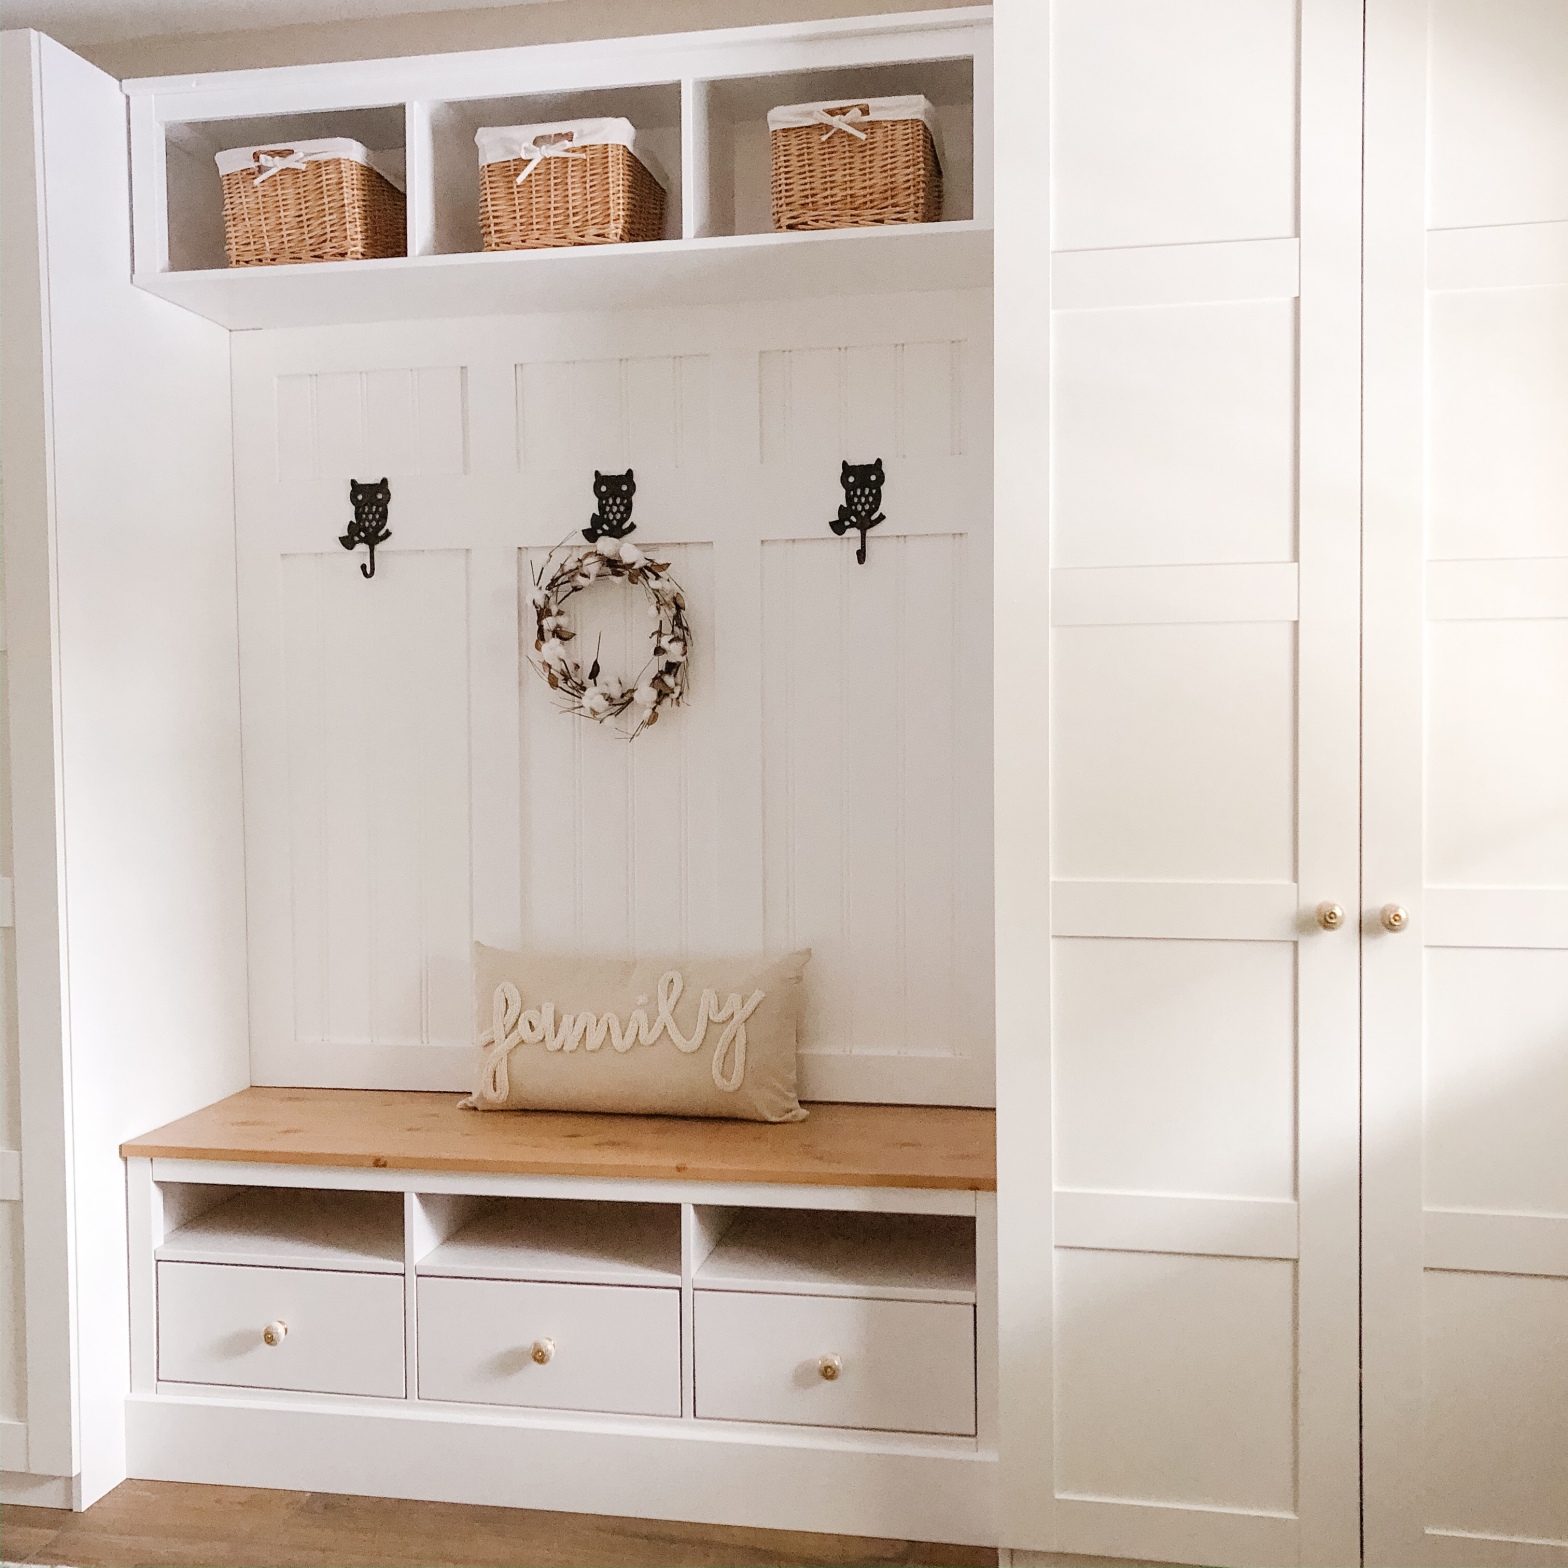
The mudroom needed serious storage. I wanted enough space to be able to store all of our outdoor accessories all year long. So I didn’t have to box up our winter stuff and store it somewhere else. And I also knew I wanted a bench for the kids to help them when getting dressed to go outside.
With us just moving, and dealing with a few unexpected expenses. I wanted to try and be smart with our money. Purchase what we need without bending the credit card. So to IKEA we went!
We were able to purchase everything we needed to make our bench built in for twelve hundred dollars. Including the basket accessories. What we bought was:
- Hemnes Bench
- (2) PAX Wardrobes
- (4) KOMPLEMENT Baskets
- Hemnes Bridging Shelf
Now IKEA only sells the Hemnes Bridging Shelf in black/brown, so I did need to add some extra time to paint it white. I used a semi-gloss and simply spray painted the pieces before assembly.

First we assembled the two PAX wardrobes. We placed one in the corner, levelled and secured to the wall. It’s very important to level as you go so your project doesn’t look off centre at the end. And you won’t want to have to fix it all said and done because it’s going to be difficult, and you will create more holes in your walls.

We then squished in the bench where we wanted it. We did not secure it because we knew it was going to stay in place from the pressure of the two wardrobes. Once we got the second wardrobe up and secured it. Last was the shelf. This was the hardest part, mainly because it’s the piece that will show if your project is level or not. And we had an even harder time because our hundred and fifty year old walls and ceilings are not level. But we took our time and it all came together. We added a piece of trim across the bench to cover the open space. I didn’t need another area where dog hair could collect.
The project was finally coming together. To complete it we decided to do a fancy design above the bench. We had extra wainscotting from the powder room and used that along with a variety of different trim to create a design. I knew I wanted three sections on the backing to match with the drawers and baskets. To help make the design even. We painted the wainscotting the same white we used for the Hemnes bridging shelf above.

Years ago I purchased these adorable cast iron owl hooks that I knew needed to go there. It was a great space to add extra storage and they really are super cute!

Some baskets from JYSK, decor from Winners and we were done! I am beyond happy with how it turned out. Thanks for reading!


Hello! Did you add any support to the TV unit to support the weight of people sitting on it. Since Ikea indicates that max weight is about 110 lbs.
LikeLike
Also wondering if you added any additional support to the tv bench?
LikeLike
It looks very nice 🙂 where did you bought the wainscotting?
KR Valerie
LikeLike
We bought it from Home Depot
LikeLike
Hi there. This looks great! Can you tell me the size of your PAX cabinet and the size and name of the cabinet doors you used?
LikeLike
We purchased the pax that already came with the doors. I believe Komplement. And this is the 39 3/8
LikeLike
The kick plate under the TV stand to cover the legs to me is the most genius thing. Changes the whole piece from a TV stand to a fancy built-in. Well played!!
LikeLike